
10 Pumpkin Carving Ideas Worth the Mess: Easy to Advanced Halloween Designs
10 Pumpkin Carving Ideas Worth the Mess: Easy to Advanced Halloween Designs
A pumpkin sits on your porch for two weeks, and for most of that time it is just a pumpkin. Then one evening you cut the top off, scoop out the seeds, and suddenly it is the thing neighbors slow down to look at. That transformation is the whole appeal of carving — one of the few Halloween decorations you make with your hands instead of buying in a bag.
You do not need artistic talent. Most great-looking pumpkins come down to three things: a design that matches your patience level, the right tool for the job, and decent lighting. A basic carving kit costing less than a pizza will beat a kitchen knife every time. Below are ten designs, from a twenty-minute classic to an evening-long project, each with the tools and technique that make it work.
1. The Classic Jack-O’-Lantern, Done Right
Difficulty: Easy | Time: 20–30 minutes
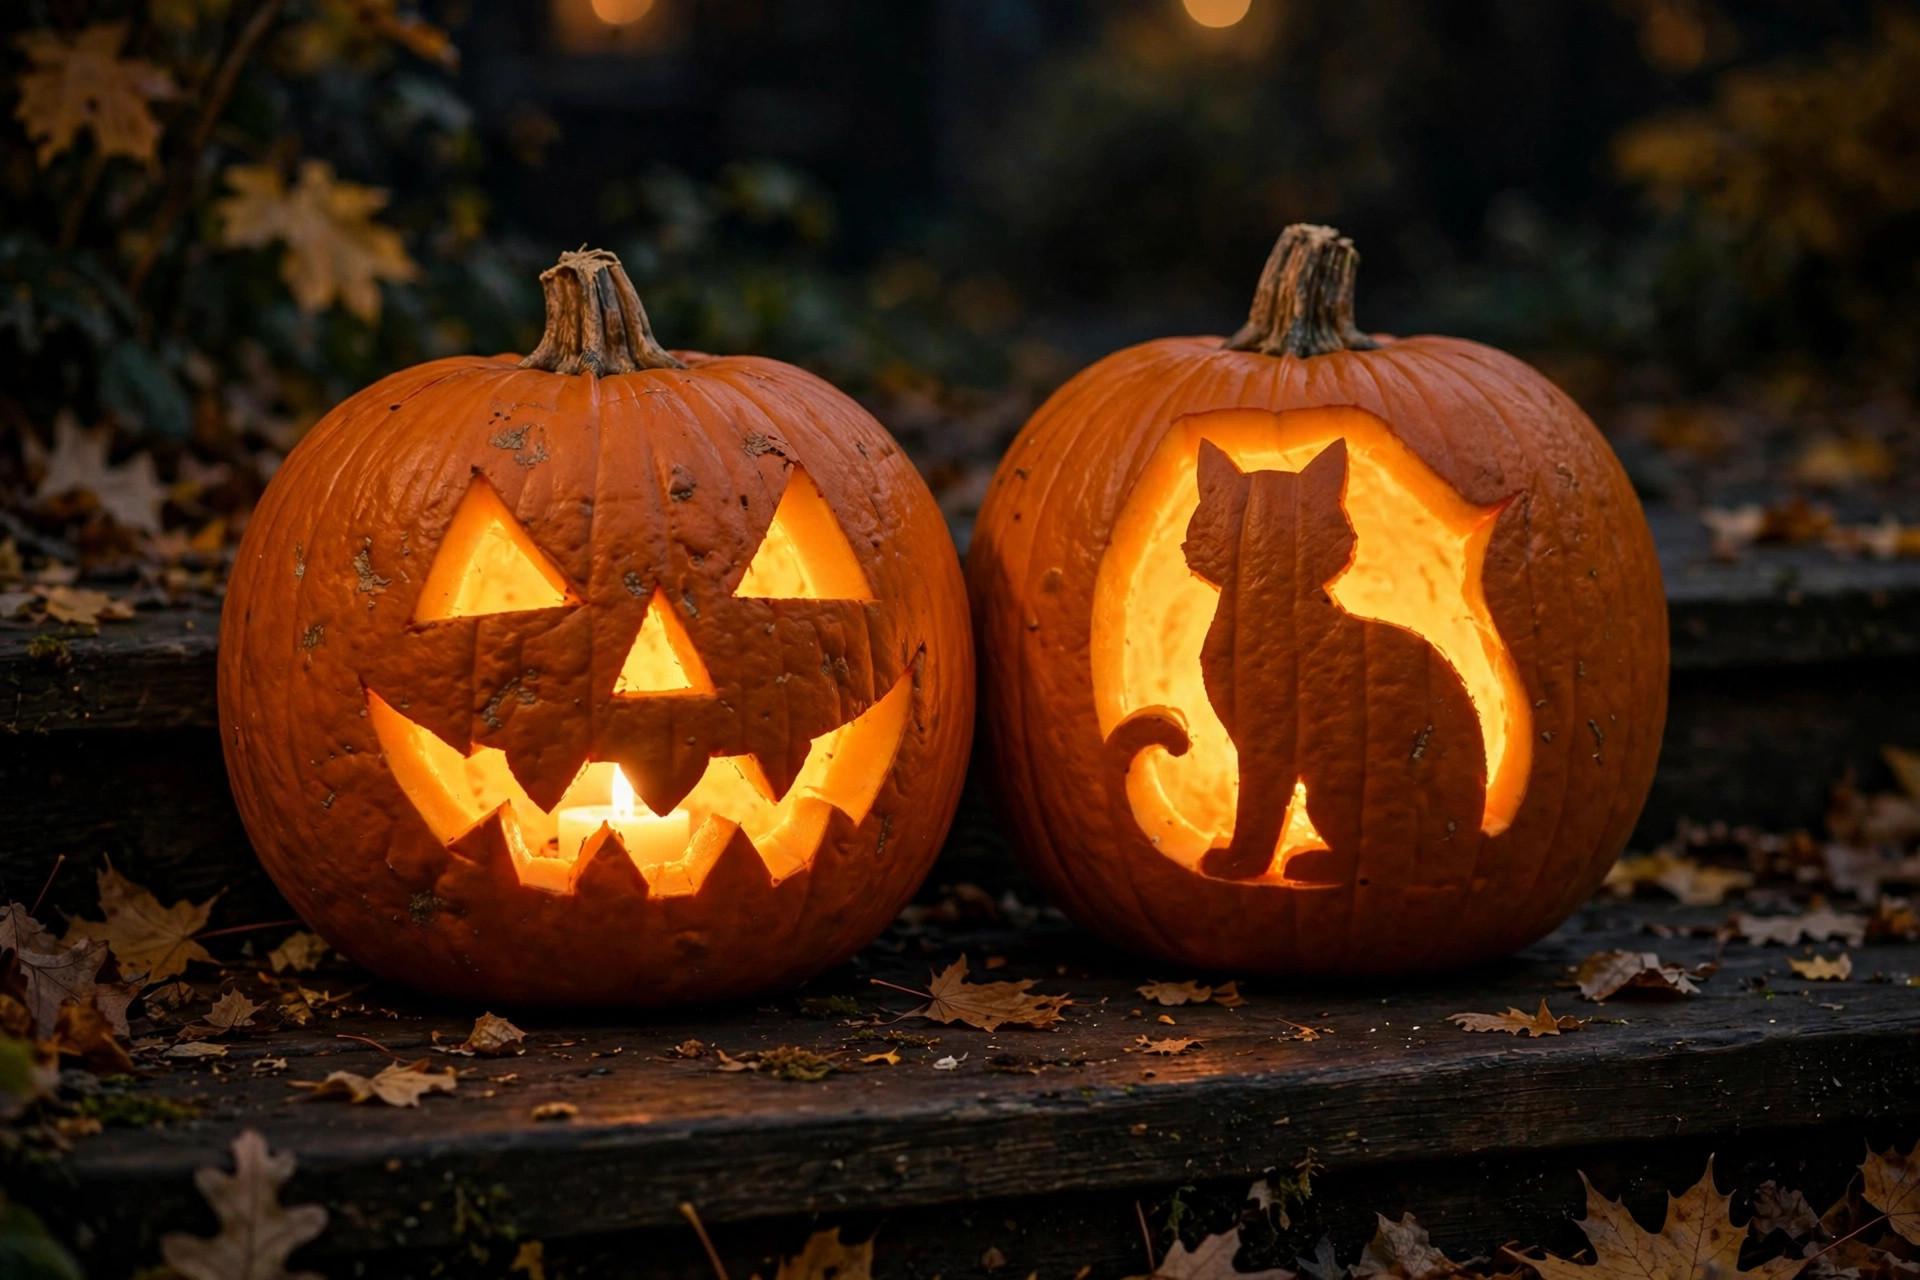
What separates a good classic face from a sad one is proportion: cut the features larger than you think they should be. Small, timid cuts vanish once the light is glowing; bold shapes read from the sidewalk. Draw the face on with a dry-erase marker first so you can wipe off mistakes.
Use the small serrated saw from a pumpkin carving kit, not a kitchen knife — kitchen knives wedge and crack the thick rind, while the thin saws cut with short, gentle strokes. Scoop the interior until the walls are about an inch thick so more light gets through. Cut at a slight inward angle so pieces do not fall through, rub petroleum jelly on the cut edges to slow shriveling, and light it with a battery LED tea light instead of a candle.
2. Black Cat Silhouette
Difficulty: Easy | Time: 30–40 minutes
A cat’s arched back, pointed ears, and curled tail make one of the most recognizable Halloween shapes, and it is almost entirely simple curves. Go for the silhouette version: carve away everything around the cat so the cat itself stays dark against the glow. Cutting one big background area is far simpler than carving fiddly details.
You will need a carving saw plus a drill or awl for the eyes — two slanted almond shapes. If freehanding makes you nervous, tape on a printed template, poke the outline through with a pin, and connect the dots. Poke whiskers through tiny drilled holes with thin wooden skewers rather than carving them. Keep the tail’s connecting bridge of rind at least half an inch wide or it will snap.
3. Drill-Bit Dot Patterns
Difficulty: Easy | Time: 30–45 minutes
This is the design for people who own a power drill and zero drawing ability. Different bits punch clean, perfectly round holes, and a field of holes becomes stars, swirls, or a constellation. No sawing, no templates — just dots that look intricate when lit. Kids can mark the dots with a marker while an adult runs the drill.
Use 1/8-inch bits for fine dots and 1/4-inch or 3/8-inch for bolder ones, plus painter’s tape as a guide line. Always hollow the pumpkin first — drilling into a solid pumpkin risks cracking the shell. Drill from the outside in at medium speed and let the bit do the work; pushing hard is what cracks pumpkins. Vary hole sizes in a deliberate small-large-small rhythm so it reads as a pattern, and put warm-white fairy lights inside for a lantern glow.
4. Friendly Ghost with Bats
Difficulty: Easy | Time: 25–35 minutes
Not every pumpkin needs to be scary. A round-bodied ghost with two oval eyes and an “o” mouth, surrounded by small bats, is a good first carving for kids because every shape is a curve — and it reads instantly even if your ovals are lopsided.
A carving saw plus a melon baller or apple corer is all you need; round cutters punch perfect circles with one twist, no sawing around curves. Carve the bats as simple “m” shapes in different sizes so they look like they are flying at different distances, and tilt a couple — perfectly horizontal bats look stamped on. Cool-white LED for spooky, warm LED for cozy.
5. Haunted House on the Hill
Difficulty: Intermediate | Time: 1–2 hours
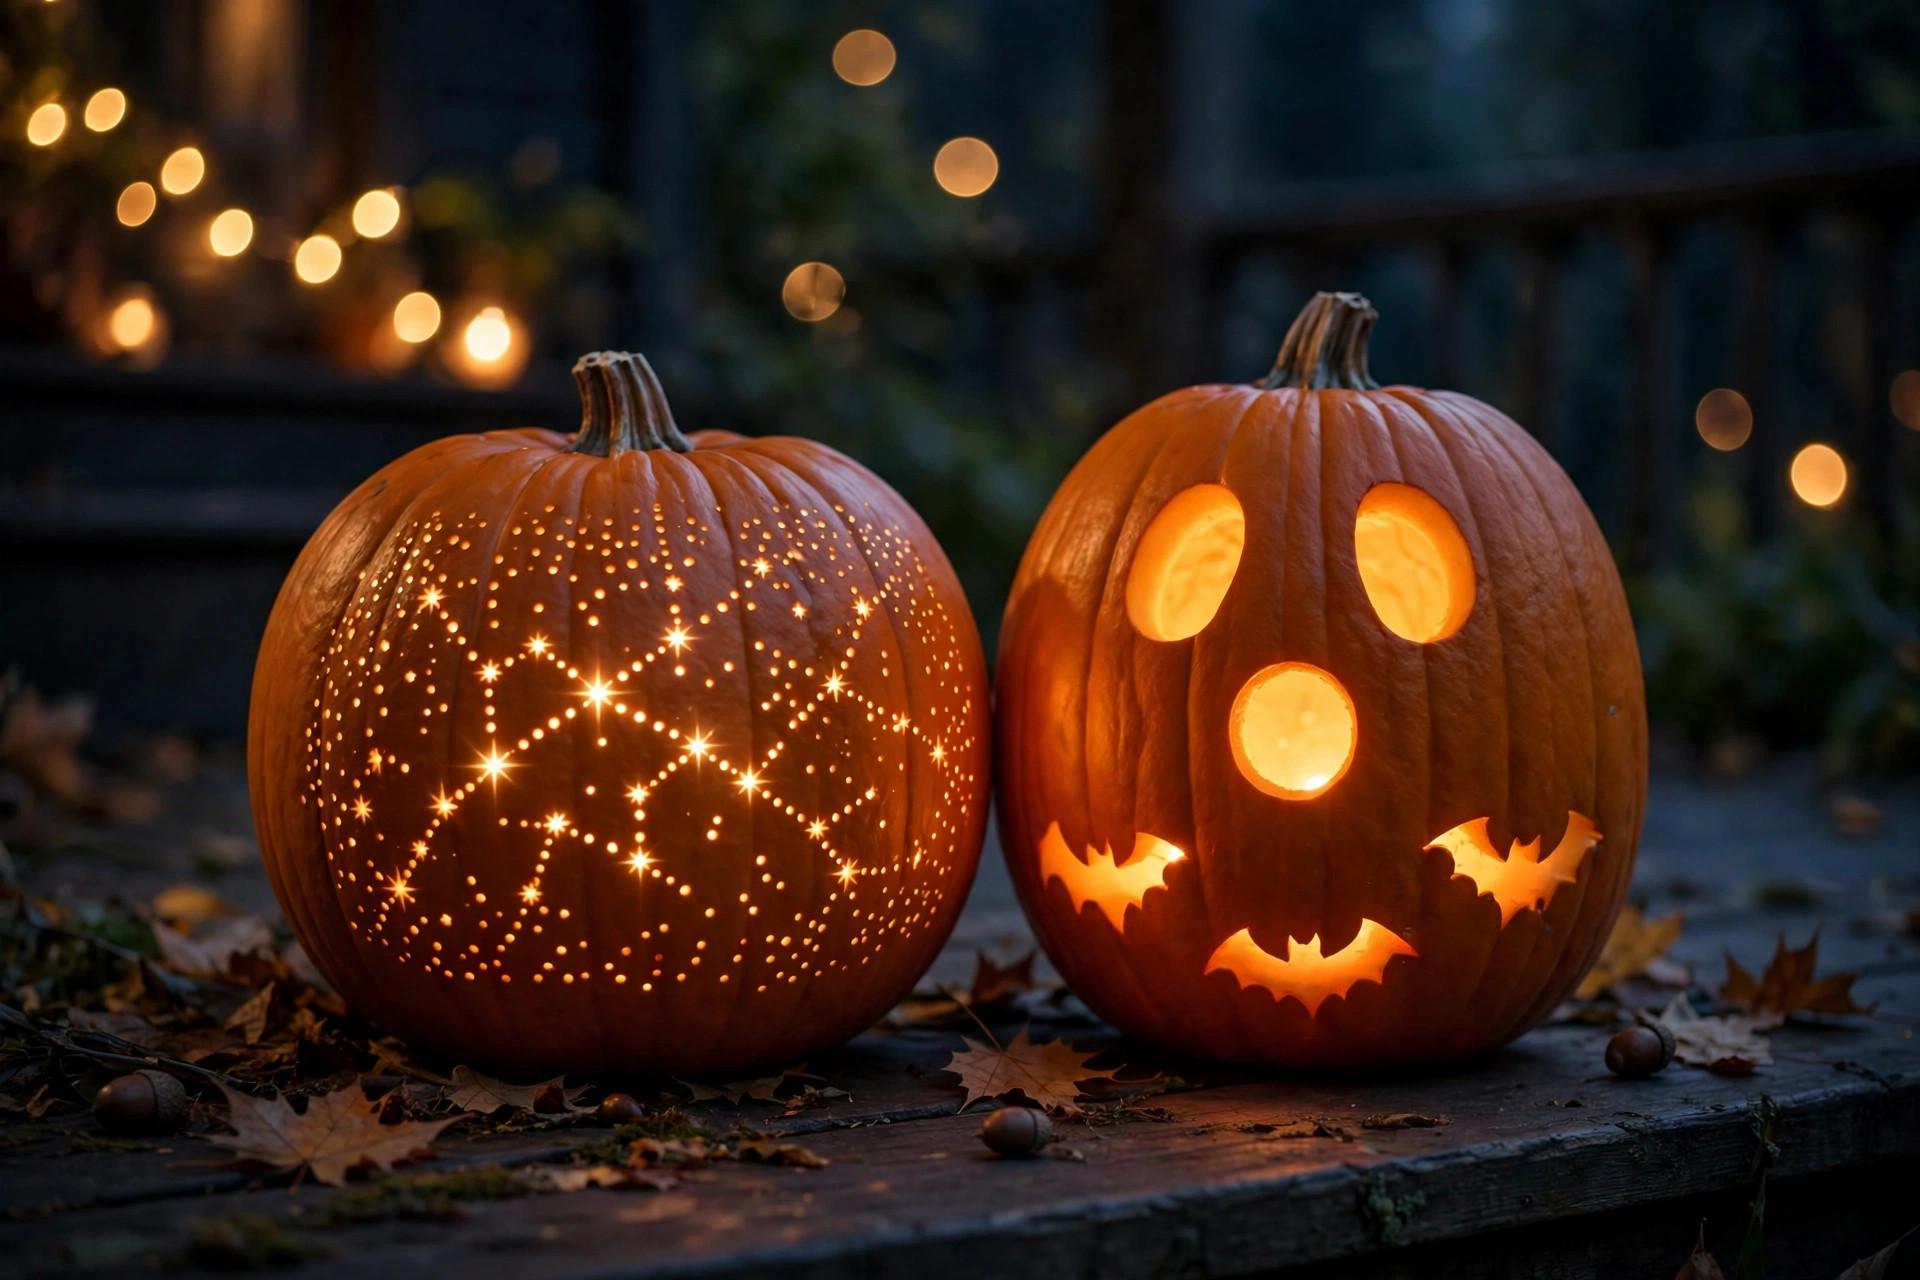
This is where carving starts feeling like art. Instead of cutting through, you shave the rind in layers: the deep orange skin comes off to reveal paler flesh, and when lit, scraped areas glow while untouched rind stays dark. A haunted house with crooked windows, a dead tree, and a moon becomes a small glowing diorama — the house stays dark, everything around it gets scraped.
You will want a linoleum cutter or clay ribbon tool — the U-shaped gouge is ideal — plus the standard saw for the moon. Transfer the scene by taping on a printout and poking along the lines with a pin, and pick a pumpkin with a broad, fairly flat face. Scrape in thin passes: the difference between “glows softly” and “cut through” is about a millimeter. Scrape the moon thinnest so it glows brightest, keep window frames fully dark, and check your work from six feet away — that is the distance everyone else sees it from.
6. Witch Silhouette Against the Moon
Difficulty: Intermediate | Time: 1–1.5 hours
A witch on a broomstick crossing a big round moon is the most classic Halloween image there is, and on a pumpkin it is almost all silhouette work: the witch cut as one connected dark shape against a fully carved-out glowing circle. Since the moon is just a circle, all the difficulty sits in the witch’s outline — and templates for exactly this are easy to find.
Use a carving saw plus a detail saw for the hat point and broom bristles, the thinnest parts and most likely to snap. If a bristle breaks, a toothpick splint inside fixes it invisibly in the dark. Make the moon generous — at least four inches across on a medium pumpkin — or the witch looks cramped and the whole thing reads as a blob from the street. Leave a solid rind bridge above and below the moon so the structure holds.
7. Sugar Skull (Calavera)
Borrowed from Día de los Muertos imagery, the sugar skull is the most intricate design here: symmetrical florals, a heart-shaped nose, a stitched mouth, decorated eye sockets. It combines every technique — cut-outs, scraped shading, fine incised lines — but the symmetry does half the visual work for you.
You will use the full kit: saw, detail saw, gouge, and a craft knife for incised lines. Draw half the design on paper, fold it, and trace the mirror image so the symmetry holds. A white or pale pumpkin makes scraped details pop even in daylight. Work in order: cut-outs first, then scraping, then fine lines last — scraping after ruins fine lines. For the stitched mouth, incise thin lines just through the outer skin; they glow as delicate lines. Wipe the surface with a damp towel as you go, since drying pumpkin juice dulls the contrast.
Difficulty: Advanced | Time: 2–3 hours
8. Spiderweb with a 3D Spider
A spiderweb is one of the most forgiving “impressive” carvings because webs are supposed to be irregular. Scrape the radial lines and arcs as thin lines rather than cut-outs and they glow like silk threads. The spider — big, black, three-dimensional — gets built separately and attached; the contrast with the flat glowing web is what makes people look twice.
Scrape the web with a linoleum gouge: six to eight spokes from a center point, connected with slightly saggy arcs — real webs droop, and the sag sells it. Keep lines thin enough to glow but leave the hub thicker as the anchor. For the spider, use a small black craft pumpkin or black air-dry clay with pipe-cleaner legs bent at a distinct knee joint (straight legs look like a craft project; jointed legs look like a spider). Mount it with a skewer through a drilled hole from inside.
Difficulty: Intermediate | Time: About 1 hour

9. Constellation Night Sky
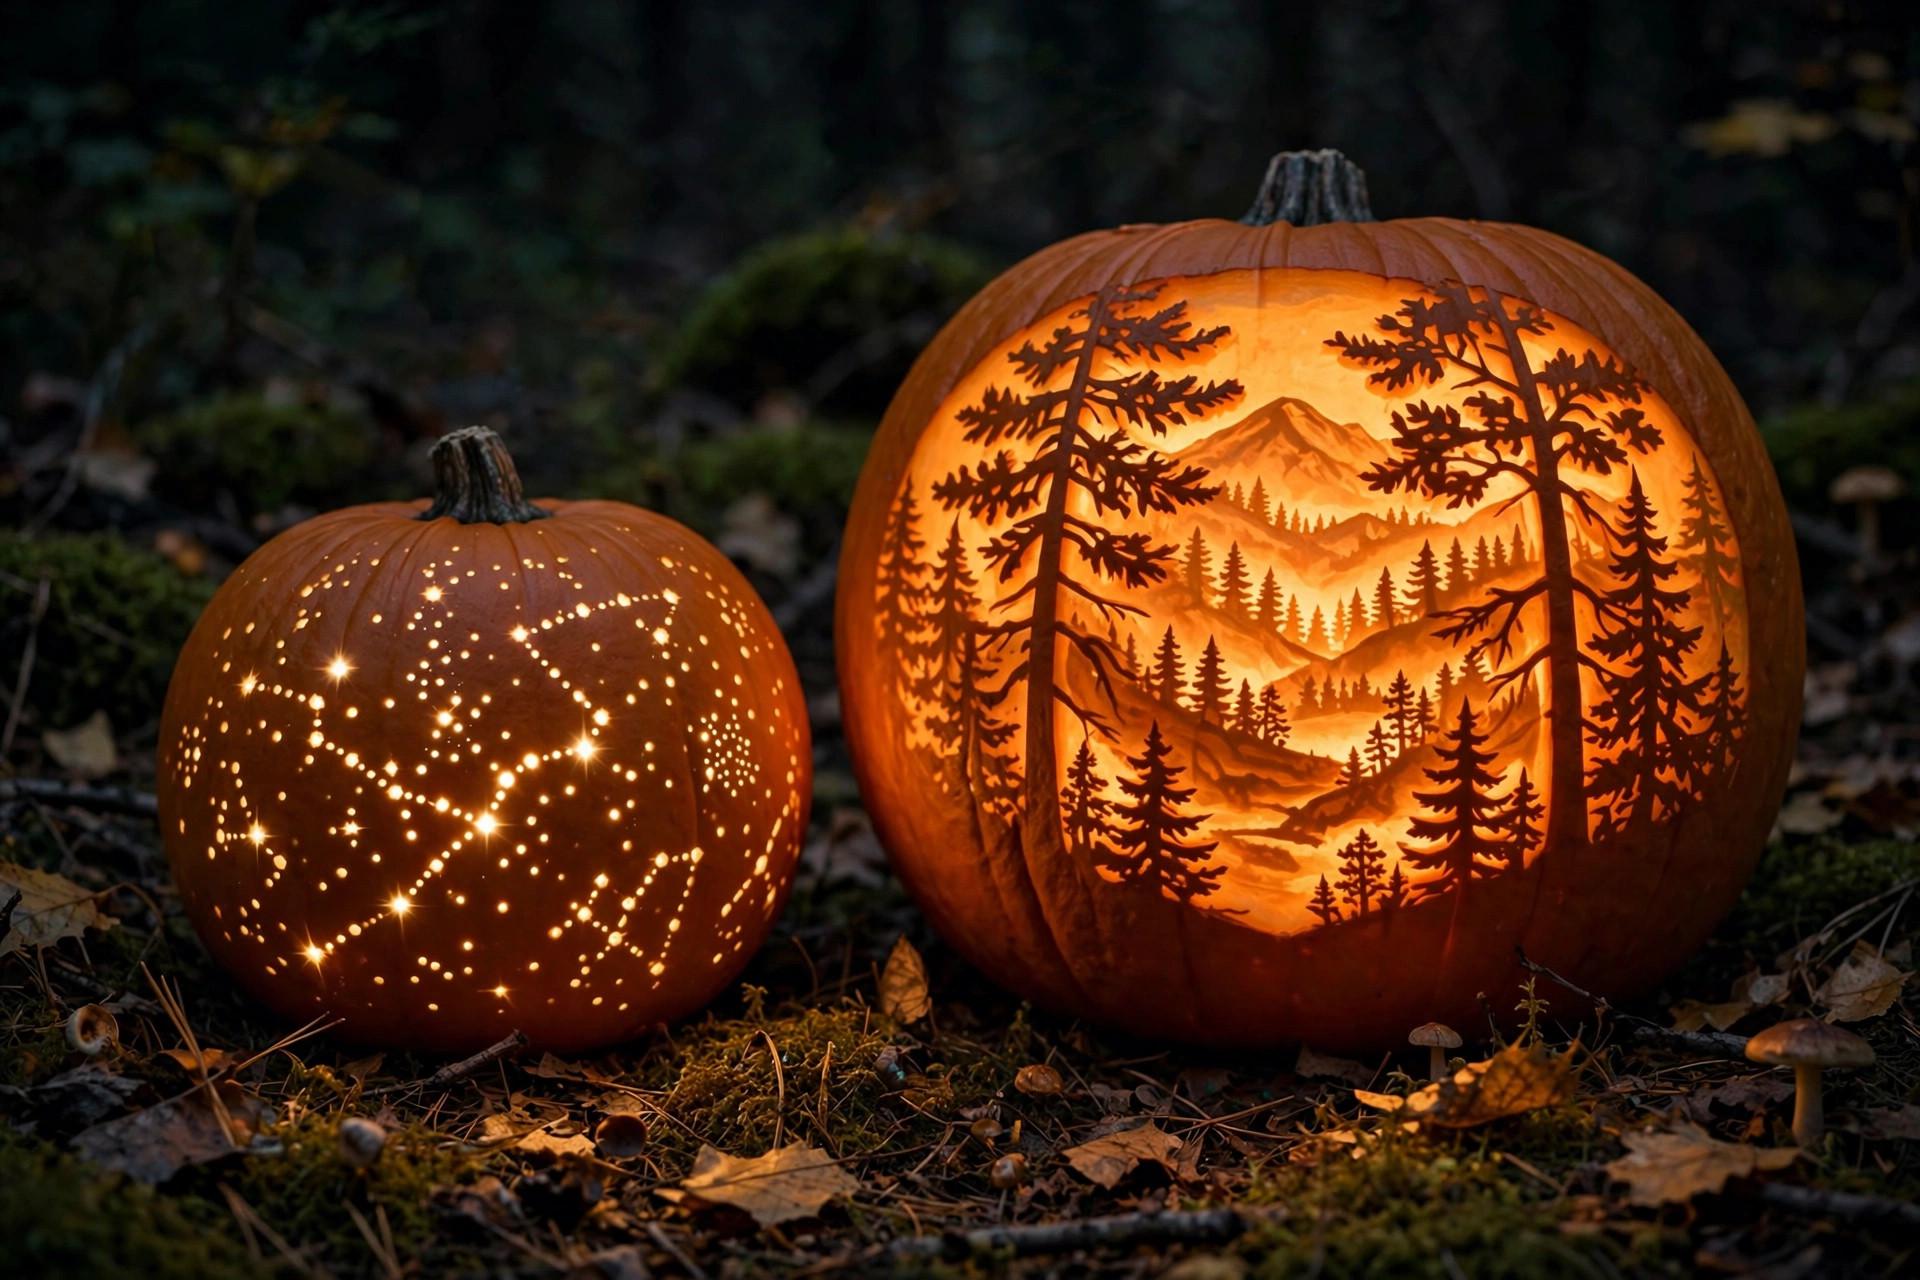
Pick a real constellation — Orion, the Big Dipper, Cassiopeia — and drill its stars at their true relative positions. In daylight it looks like random holes; lit from within at night it becomes a small planetarium. You are copying a pattern, not inventing one, so it cannot really go wrong.
Tape the constellation printout to the pumpkin and drill right through the paper at each star — the paper keeps the bit from skating on the curved rind. Use a bigger bit for the brightest stars so they glow larger, like real star magnitudes. Add a faint “milky way” band of pinprick holes around it for depth; dozens of tiny holes take five minutes and transform the effect. Keep it on one face — wrapping around the curve distorts the pattern — and use a slow color-changing LED inside.
Difficulty: Intermediate | Time: 45–60 minutes
10. Layered Luminary Carving
This is the technique behind pumpkins that look like glowing paintings — a forest, a wave — rendered in shades of orange light. Scrape the rind to different depths: deep scraping glows bright, shallow scraping glows dim, untouched rind stays dark. Three or four depth levels give you real shading. There is no shortcut; you are sculpting light.
Work under a bright lamp with gouges in different widths, and sketch the light and dark areas before touching the pumpkin. Leave your darkest darks completely alone, then work from the brightest areas inward. Check progress by holding a flashlight inside — the only honest preview. If you break through where you meant to keep it dim, orange tissue paper taped inside over the hole dims it back down, and no one will ever know.
Difficulty: Advanced | Time: 2–4 hours
Wrapping Up
The pumpkin you carve does not need to be perfect — it needs to be lit. Every design here, from the twenty-minute ghost to the four-hour luminary, looks dramatically better in the dark with a decent light inside than it ever will on the kitchen table at noon. Pick the one that matches your evening, gather the right tools before you start, and give yourself more time than you think you need.
Then put it where people can see it. A great carving on a dark side porch is a waste — the front steps, the walkway edge, a window facing the street is where the work pays off.
Frequently Asked Questions
How long does a carved pumpkin last?
About 5 to 7 days, sometimes longer in cool weather. Heat is the enemy — a pumpkin on a sunny porch in warm weather softens much faster than one kept cool. Carving two to three days before Halloween is the simplest way to make sure it still looks good on the night, and petroleum jelly on the cut edges can add a few extra days.
What is the safest way to carve a pumpkin with kids?
Give kids the jobs without blades: drawing the design, scooping seeds and pulp, marking dots for an adult to drill. Small serrated saws from carving kits cut with a gentle sawing motion and are far easier to control than kitchen knives, which is why many families keep a kit on hand. Keep the workspace well-lit, cut away from your body, and take breaks — most nicks happen when hands get tired.
Should I use a real candle or an LED light?
LEDs have mostly won for practical reasons: no open flame near dried pumpkin flesh, no scorched lid, no relighting in wind, plus color options candles cannot match. A real candle gives a natural flicker LEDs never perfectly reproduce — but if you use one, keep the pumpkin away from anything flammable and never leave it burning unattended.
How do I keep my carved pumpkin from collapsing?
Leave walls about an inch thick, and connect every carved section to the main body with rind bridges at least half an inch wide — floating pieces with no support cave in. Cutting the opening in the bottom instead of the top also helps: the pumpkin sits on its own base and you set it directly over the light.
Can I carve a pumpkin without special tools?
Yes — a sturdy spoon and a small serrated knife handle a basic jack-o’-lantern. But a dedicated kit, usually under ten dollars, cuts cleaner with noticeably less effort and lasts for years. For drill-based designs, a standard household power drill is all you need beyond the bits.
About 5 to 7 days, sometimes longer in cool weather. Heat is the enemy — a pumpkin on a sunny porch in warm weather softens much faster than one kept cool. Carving two to three days before Halloween is the simplest way to make sure it still looks good on the night, and petroleum jelly on the cut edges can add a few extra days.
Give kids the jobs without blades: drawing the design, scooping seeds and pulp, marking dots for an adult to drill. Small serrated saws from carving kits cut with a gentle sawing motion and are far easier to control than kitchen knives, which is why many families keep a kit on hand. Keep the workspace well-lit, cut away from your body, and take breaks — most nicks happen when hands get tired.
LEDs have mostly won for practical reasons: no open flame near dried pumpkin flesh, no scorched lid, no relighting in wind, plus color options candles cannot match. A real candle gives a natural flicker LEDs never perfectly reproduce — but if you use one, keep the pumpkin away from anything flammable and never leave it burning unattended.
Leave walls about an inch thick, and connect every carved section to the main body with rind bridges at least half an inch wide — floating pieces with no support cave in. Cutting the opening in the bottom instead of the top also helps: the pumpkin sits on its own base and you set it directly over the light.
Yes — a sturdy spoon and a small serrated knife handle a basic jack-o’-lantern. But a dedicated kit, usually under ten dollars, cuts cleaner with noticeably less effort and lasts for years. For drill-based designs, a standard household power drill is all you need beyond the bits.